


We all want to have a flat, toned mid-section, and after having kids this can be a challenge. To get the best potential results, we need to: 1) eat a healthy, low fat diet 2) burn calories and fat through cardiovascular exercise, and 3) train the core, not just the abs. The muscles of the core provide stability and mobility for the spine, pelvis, rib cage, and hips, so we must go beyond regular crunches to get the job done. In this post, I’ll show you ways to improve and advance familiar core exercises. All of these are simple, and can be done anytime… sometimes I do these in my living room while my kids play! Check with a medical professional before doing these exercises if you have a history of neck, shoulder, back, knee, or hip issues, or if you are unsure if these are appropriate for you.
1)Forearm Plank
The plank is an excellent exercise for building core strength and stability. When doing planks, the emphasis should be on correct form, not duration. We’re better off holding a good plank for 10 seconds at a time, rather than holding a bad one for two minutes. When creating a plank, lift and stay on your toes, pull the abs in, keep the back flat, and butt down. (It’s a lot to remember, but the form will become automatic after a while!) When you are fatigued, you will most likely lift your butt in the air, or droop at the hips. Discontinue the plank at that time.
If you are capable of holding a plank for a long duration, go for it! If not, start with 10 to 30 seconds, take a 5 to 10 second rest break, then do another plank. You can continue this for several repetitions. Beginners can modify by doing a plank on their thighs.
Plank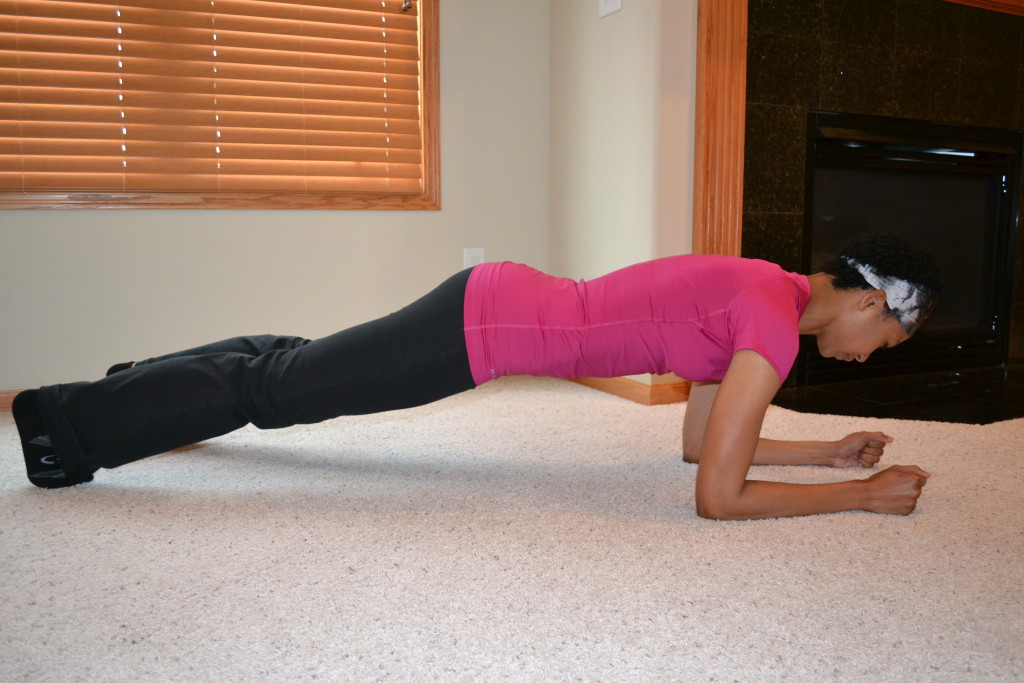
2) Side Plank
The concepts from plank also apply to side plank. Emphasize form over orm over duration. When creating a side plank, keep the elbow in line with the shoulder, and hips stacked. Pull the abs in, focusing on lifting and holding the obliques away from the floor. When you are fatigued, your supporting arm will begin to bear more weight, your hips will roll forward, or you may just feel yourself drop. Discontinue the plank at that time. If you are capable of holding a plank for a long duration, go for it! If not, start with 10 to 30 seconds, take a 5 to 10 second rest break, then do another plank. You can continue this for several repetitions. Beginners can modify by doing a side plank on their knees.
Side Plank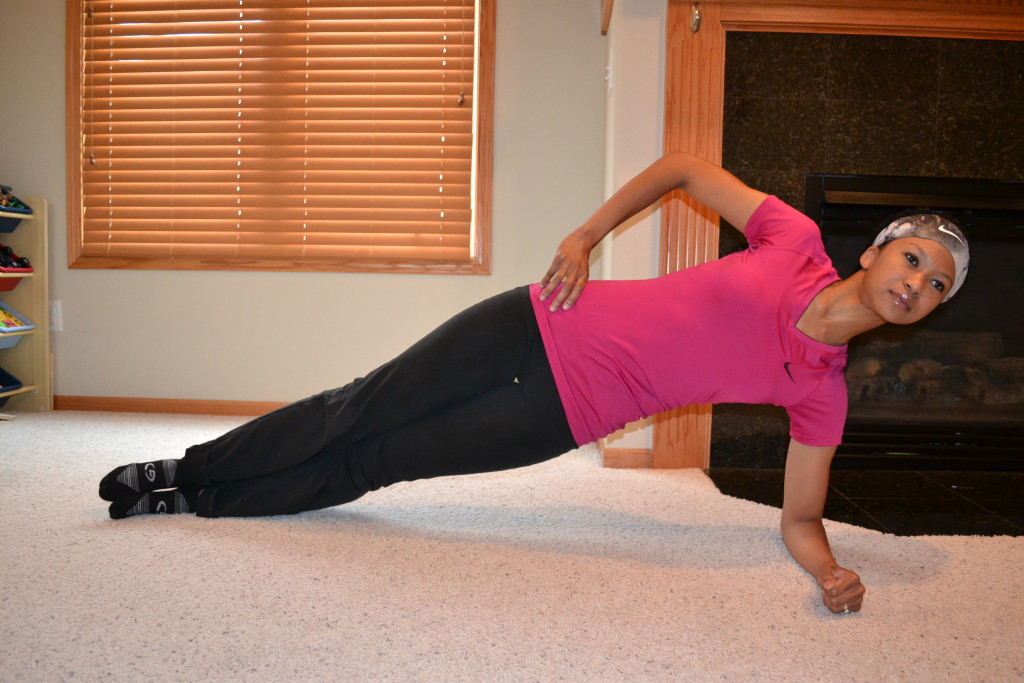
3)V-Sit
The v-sit is an exercise commonly used in Pilates. It can also be used to determine your level of core strength. If your core is strong, you will be able to lean farther back, and raise the legs higher while remaining stable. There are many variations to the v-sit, but for our purposes I will show you a basic position with two options for advancing the exercise.
Begin the v-sit by centering yourself on the bony protrusions of your rear (known as the “sits” or “sitz” bones). You’ll be able to feel when you’re in the correct position. Place your heels on the floor, cross your arms against your chest, then lean back until you feel your abs engage. I call this the “Level One” v-sit. You can place your arms out at your sides if/when you feel stable. When you are fatigued, you will start to feel your back doing the work, or your abs will feel unstable and shaky. Again, the emphasis is on form, not duration. When your form starts to slip, take a 5 to 10 second rest break, then resume the exercise. Beginners may not be able to lean back very far at first, but this should improve over time.
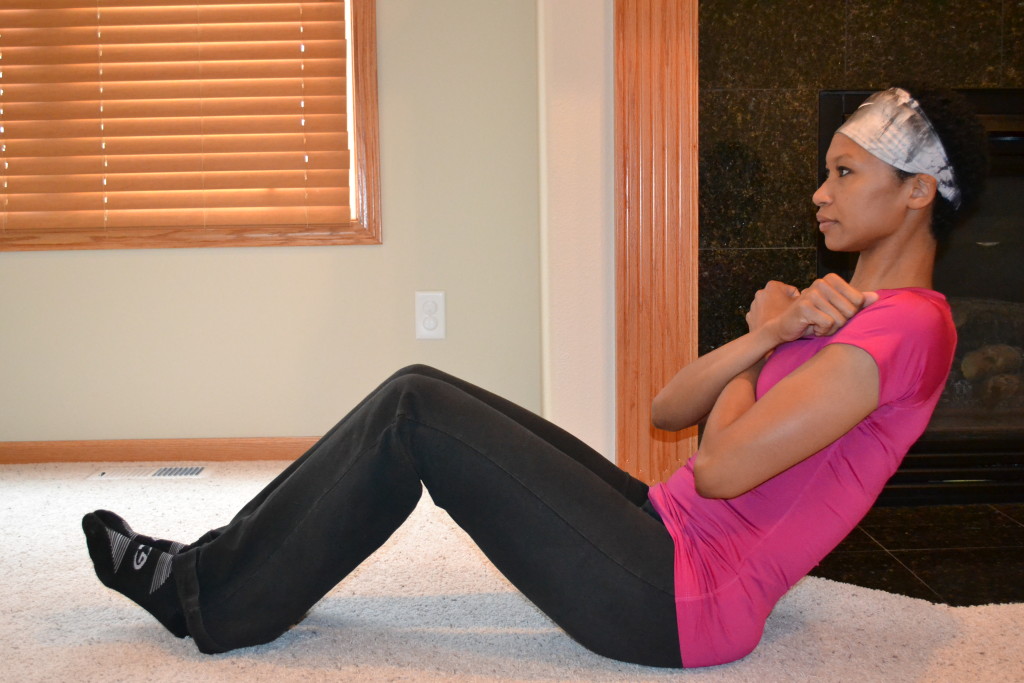
Level 1 v-sit
The Level 2 v-sit is similar to the Level 1. You will hold the basic v-sit position while raising your heels off the floor, increasing the angle of your lean if you can. Your arms should be out at your sides.
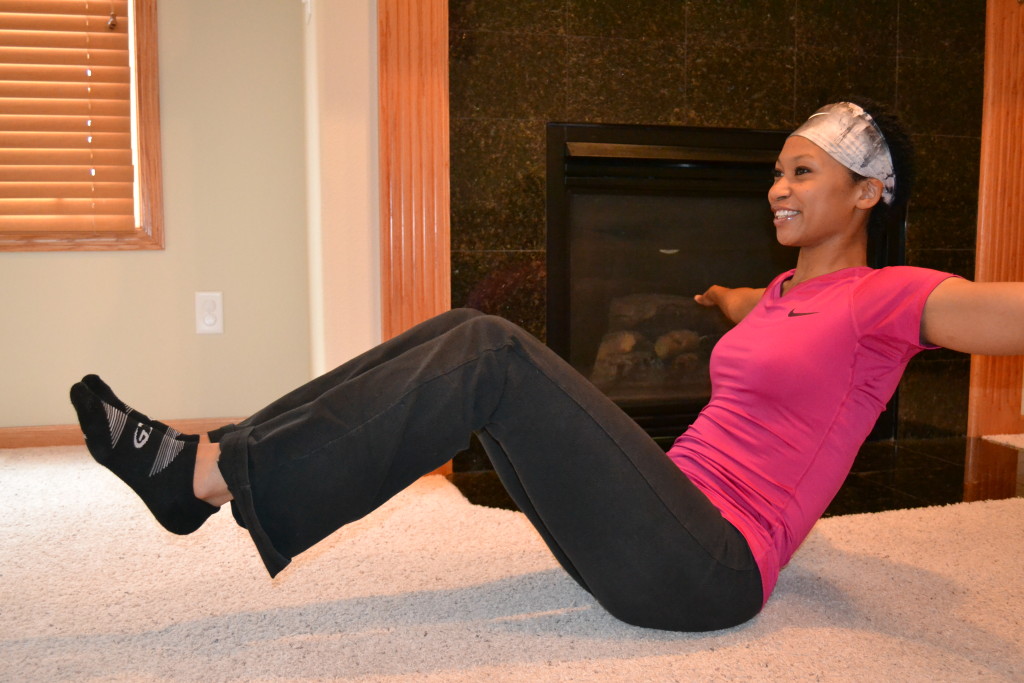
Level 2 v-sit
For the Level 3 v-sit, you will straighten and raise the legs, and increase the angle of your lean. Your arms should be out at your sides.
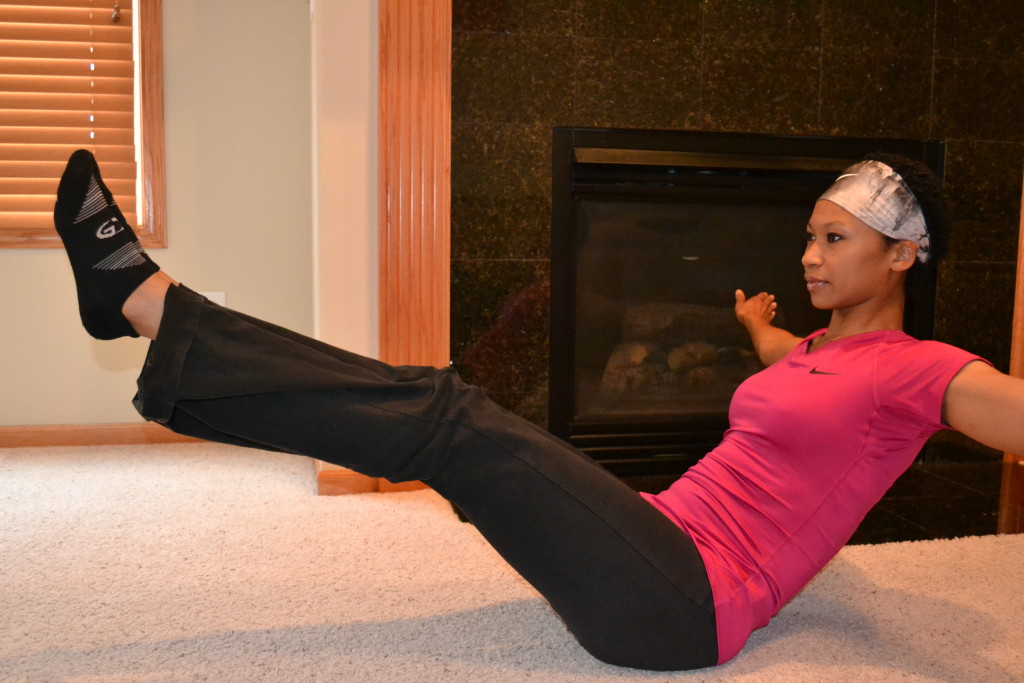
Level 3 v-sit
4) Bicycle 2.0
We all know how to do a bicycle crunch. The bicycle is a good exercise for the abs and obliques, but upgrading to version 2.0 will work the back as well, making it effective in engaging the entire core.
To do the Bicycle 2.0, straighten one leg and place the opposite foot against the knee. Your legs will always remain in contact for this exercise. Think of your legs as being glued together, but able to slide against each other. To begin, lift the shoulders and upper back off the floor, and turn towards the bent knee. Turn and lift your torso to the opposite side, while sliding the legs so the opposite knee is bent. Bring your elbow to the bent knee if you can. Bring the legs and torso back to the starting position. Complete your repetitions on one side before moving on to the other. You may only be able to do 8 to 10 repetitions on each side to start, but you should be able to do more as you get stronger.
Bicycle 2.0 Start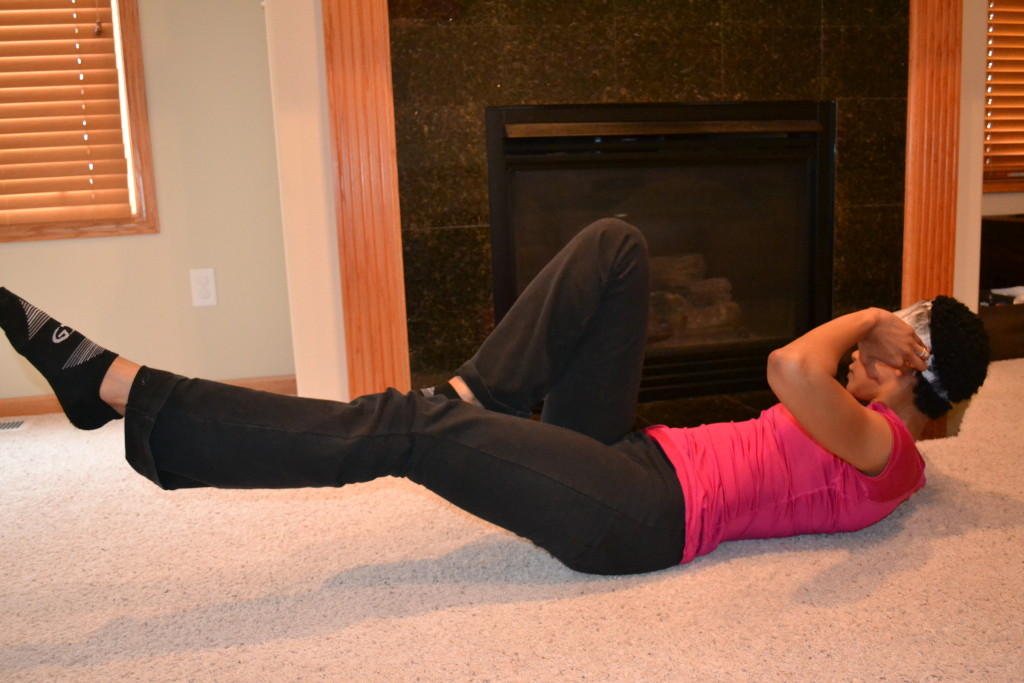
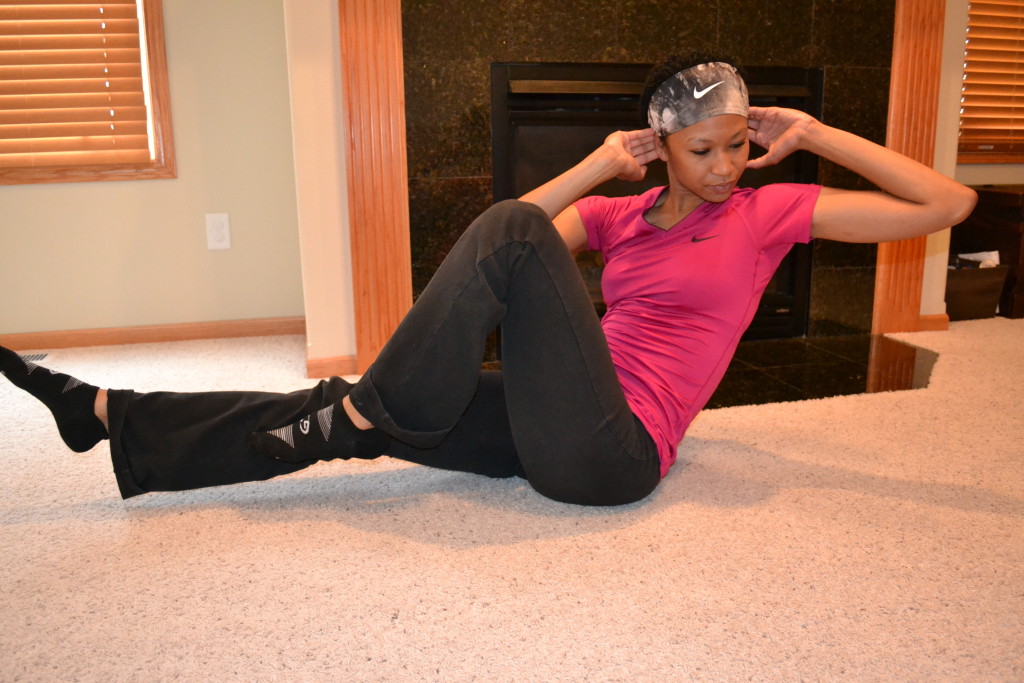 Bicycle 2.0 Finish
I hope you will find these exercises convenient and easy to do, and with continued practice you will see and feel a difference in your core. Here’s to fab abs for the summer!
Guest Blogger: Geneva Ross
 Geneva Ross has lived in Iowa all of her life. She and her husband Matt, live in Ankeny, along with their two sons, Noah (November 2007), and Evan (April 2010). After numerous miracles surrounding the birth, severe illness, and healing of Evan (born at 24 weeks gestation), she fully surrendered her life to Christ, and strives to focus on what is truly important in this life.
Besides being is a busy wife and mom, Geneva is an ACE Certified Personal Trainer and Group Fitness Instructor. She is passionate about encouraging moms to make fitness a priority in their lives, and after discovering the great variety of needs (and barriers) moms face when it comes to exercise, she created a small business, GroupEx with Geneva. GroupEx provides realistic, affordable fitness solutions for busy moms. You can find out more about Geneva, and view health and fitness tips at her blog, GroupEx With Geneva.


